

If you'd prefer to watch this on YouTube, click here.
You've probably heard that Google Analytics has been discontinued.
And it's true.
Google Analytics shut down on July 1st, 2023.
Today I'll explain:
The Google Analytics shut down alerts
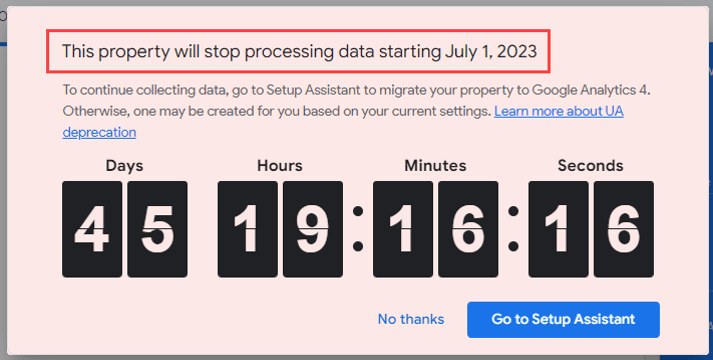
If you've logged into your Google Analytics account recently, you've probably seen a countdown timer like this:
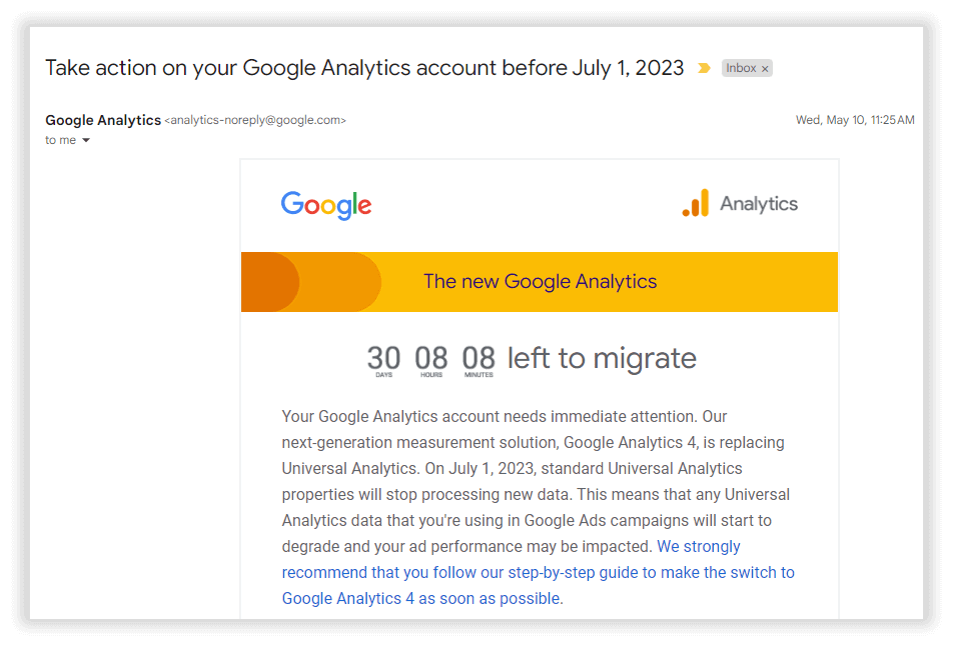
Or you've received an email like this urging you to take action:
That's because on July 1st, 2023, Google is shutting down the current version of Google Analytics and transitioning to a totally new version of Google Analytics.
The Google Analytics naming convention is a little confusing, but basically it boils down to this:
After July 1st, if you want to use Google Analytics to collect data about your website, the good news, it's still free.
But you'll need to set up a new property on Google Analytics 4, and I'll show you how to do that in just a moment.
Why is Google Analytics being discontinued?
Universal Analytics seemed perfectly good, right? So why are they discontinuing it?
There are two main reasons:
Therefore, Google Analytics 4 was developed in response to this changing digital landscape.
How to transition to Google Analytics 4
There are multiple ways to set up GA4.
I'm going to show you the quickest and easiest way to do it.
There are two scenarios we'll look at:
Scenario # 1
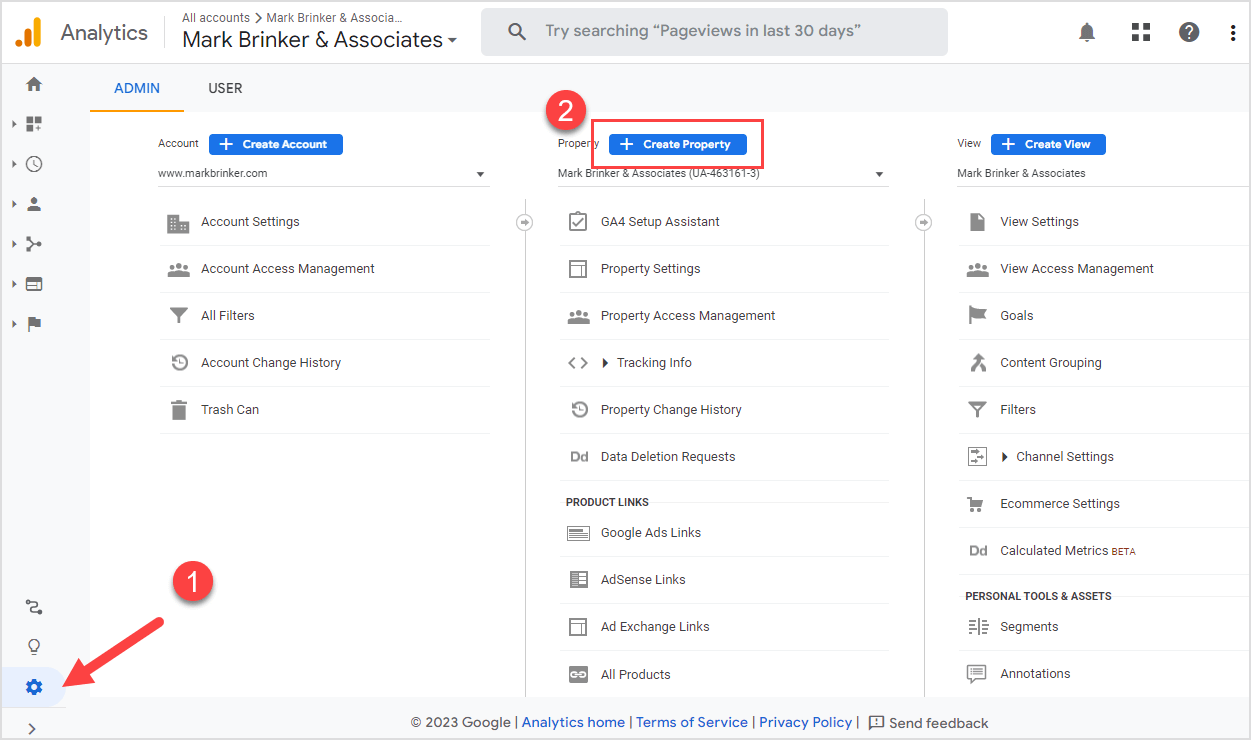
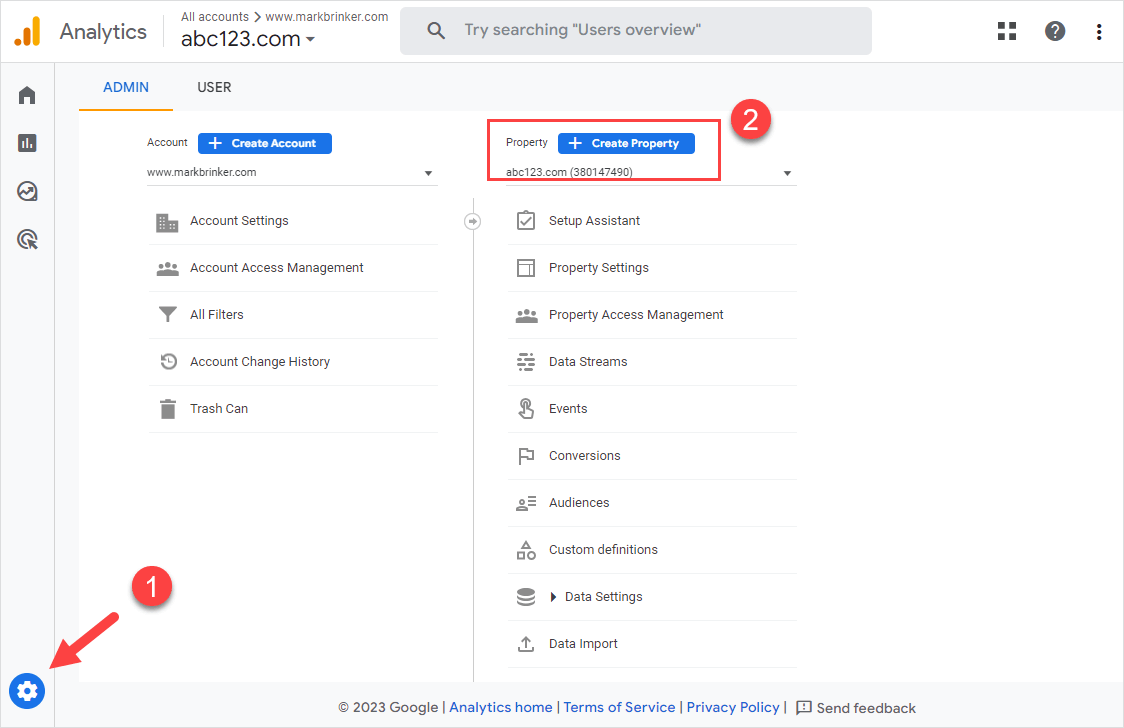
If you already have a Universal Analytics account, log into your dashboard at analytics.google.com. Click on the gear icon in the lower left, then click the blue "Create Property" button to manually create your GA4 property, as shown below.
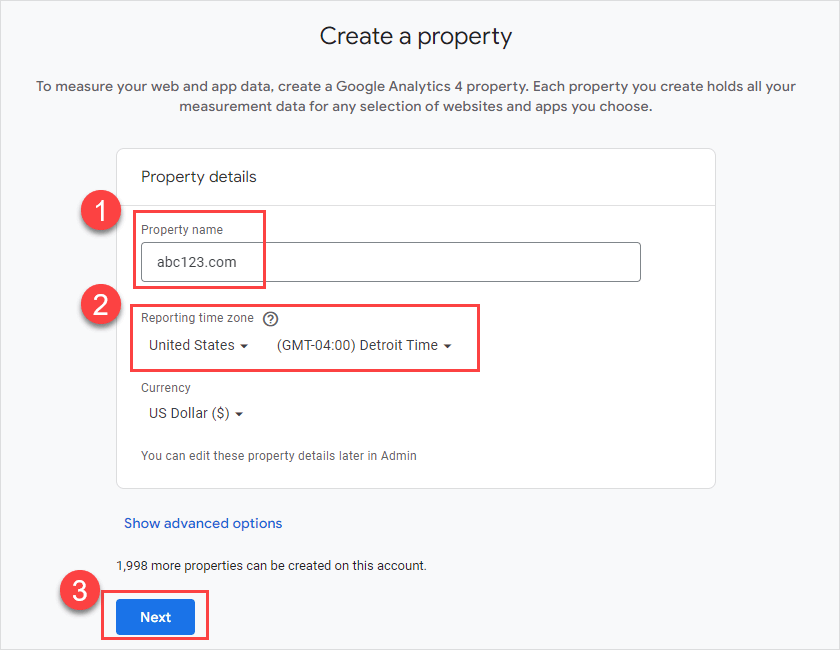
Just enter your information. Everything is pretty straightforward.
For demonstration purposes, our property will be "abc123.com". Select your time zone, then click "Next", as shown below.
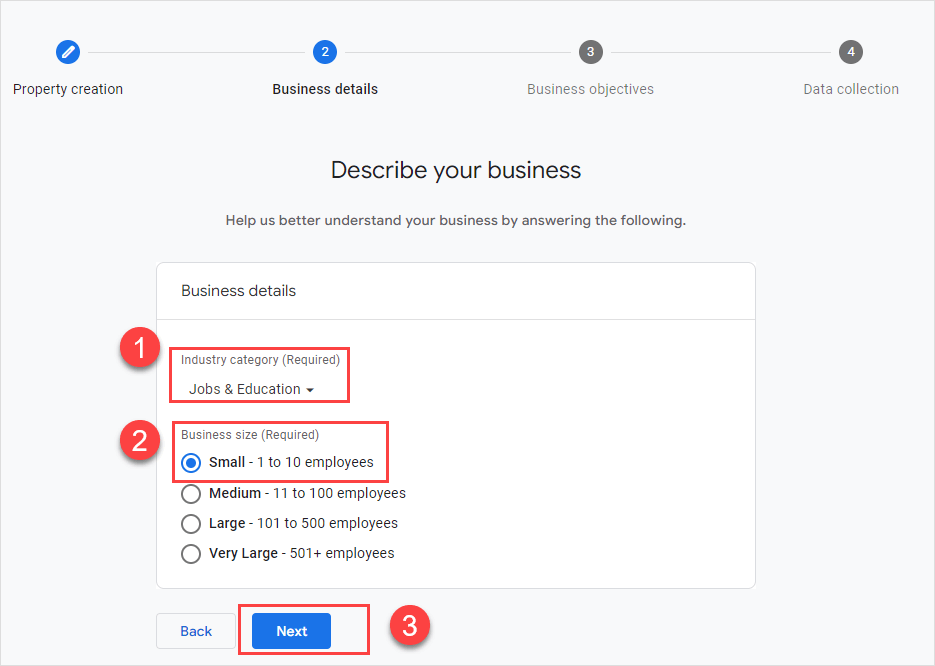
For industry category, pick whatever applies to your business. Then select number of employees and click Next, as shown below.
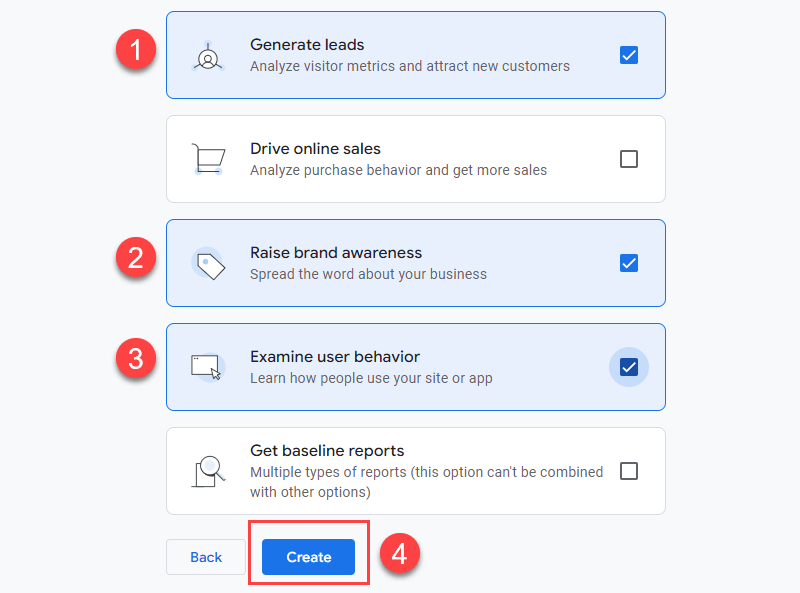
Now choose your business objectives. Just choose what makes sense. Don't overthink this. Then click the "Create" button to create your Google Analytics 4 property, as shown below.
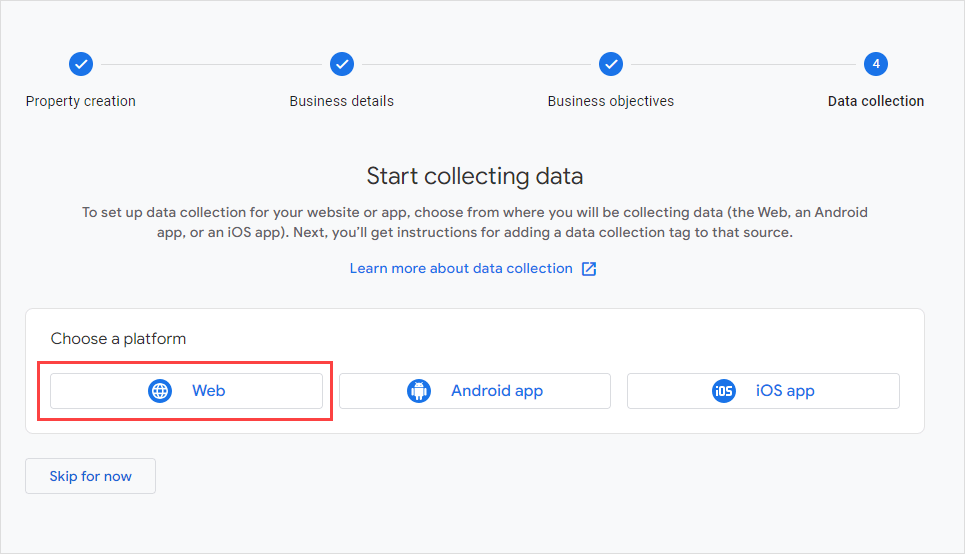
Next, very important, we have to set up our data stream. Since we're setting this up for our business website, we'll select "Web", as shown below.
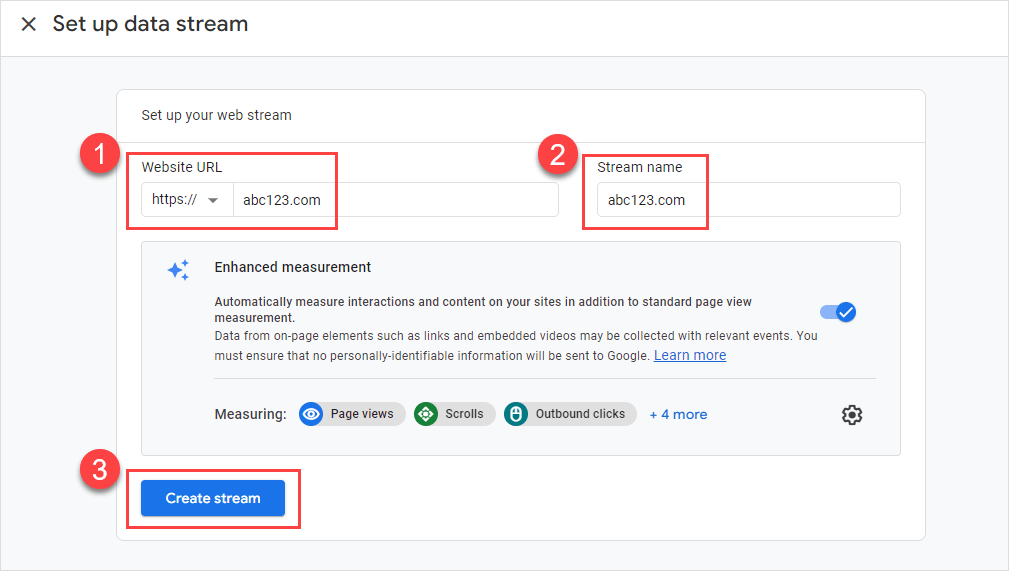
You'll then enter your website URL and stream name. Leave all other settings as is, and click "Create stream", as shown below.
You'll then be taken to a page where you'll retrieve your Google tag. Select "Install manually". This is the piece of code you'll need to install on your site and it's what sends data from your website back to your GA4 property. If you're not sure how to install this tag onto your site, just forward this entire tag to the person who manages your website and they should know what to do.
Need help?
If you find all this tech stuff about GA4 confusing, we offer done-for-you services. Just click here and tell us what you need help with.
A quick note: If you're already using Google Tag Manager, then feel free to add this tag (i.e. piece of code) to Google Tag Manager. However, if you're not already using Google Tag Manager, don't even go down that rabbit hole right now. Just keep things simple and install this tag manually. You can always upgrade to Google Tag Manager at a later date if/when the need arises. Remember, all we're trying to do right now is turn the spigot on and get the data flowing into your GA four property. That's it.
There's one additional setting we need to configure.
Once again, click the gear icon in the lower left and make sure your newly created GA4 property is selected, as shown below.
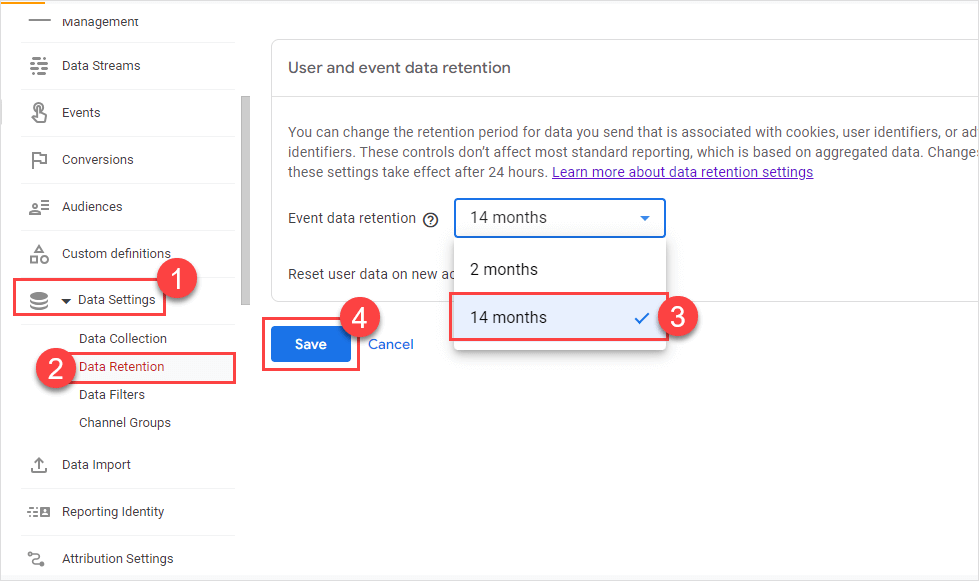
Then go down to data settings, then data retention and select "14 months" and click "Save", as shown below.
Still seeing "alert messages" like this?

If you're still seeing alert messages prompting you to complete your GA4 setup (even though you just set up your GA4 property!), here's how to get rid of those alerts ...
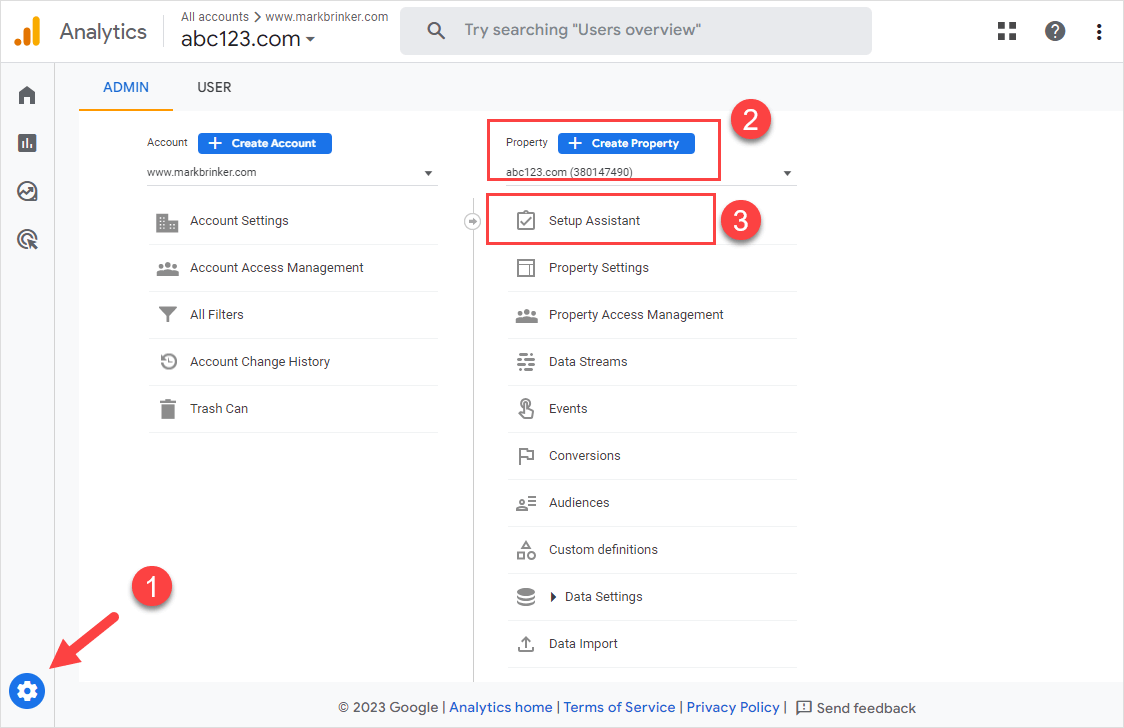
Once again, click on the admin gear in the lower left, make sure your GA4 property is selected, then click "Setup Assistant", as shown below.
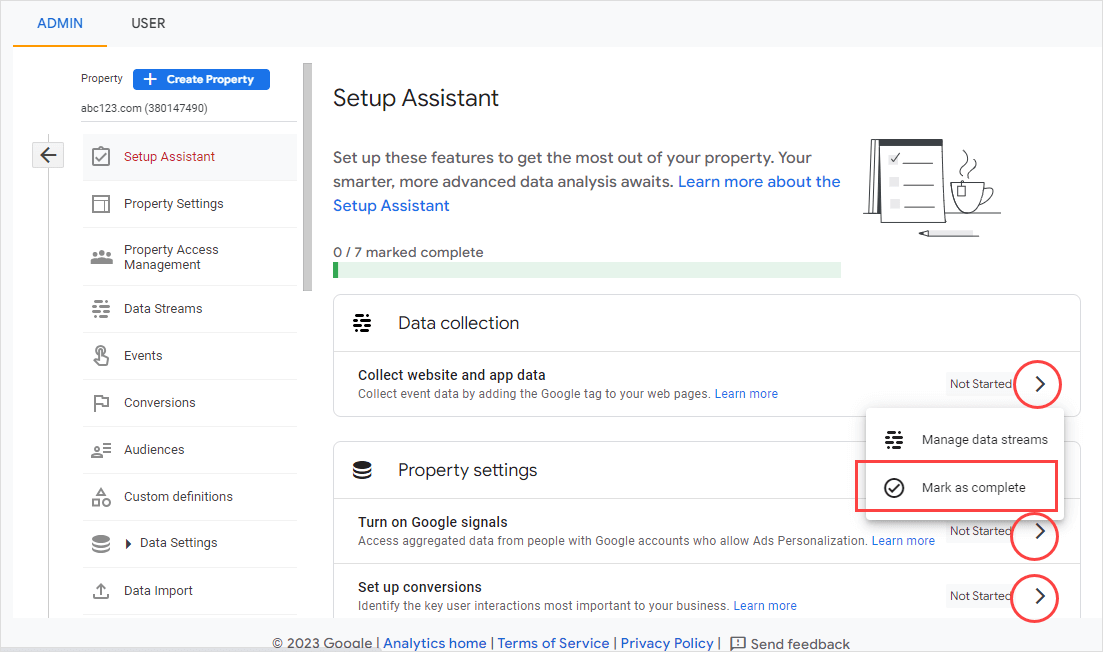
You'll then see tasks that are not completed. Go to each task, click the right arrow and mark as "complete", as shown below.
You can always go back and adjust or reconfigure things in your GA4 property at a later date. But at least this gets rid of those annoying alert messages.
EDITORIAL NOTE: The primary reason we're setting up our GA4 property manually (rather than letting Google do it for us automatically) is to ensure it's getting done correctly — which may or may not happen if you let Google do it automatically. To be clear, I'm not knocking Google. Google's own documentation recommends setting up your GA4 property manually.
Scenario # 2
For scenario # 2, where you're starting completely fresh with GA4 and you do not have an existing Universal Analytics account, the GA4 setup process will be nearly identical to what I just demonstrated.
Except the process will be a little cleaner because you won't have any baggage from a prior Universal Analytics account.
Here are the steps ...
Make sure you're logged into the Google account you use for your business.
Then go to analytics.google.com and you'll see this page:
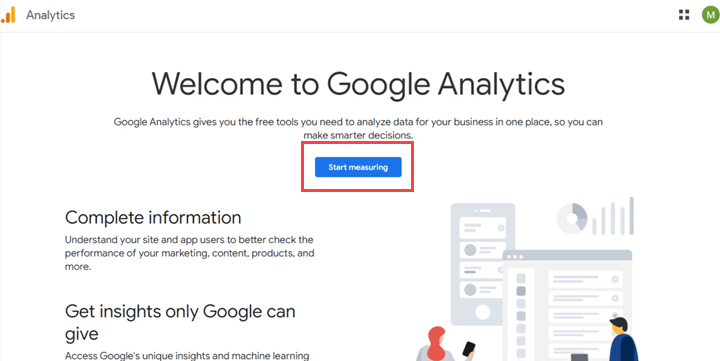
Click the blue "Start measuring" button, then just fill in the data.
The only real difference is that when you're starting fresh, like in this example, you first have to create a Google Analytics account, then you create your GA4 property within your account. Whereas in scenario # 1, your Google Analytics account was already created and we went straight to creating your GA4 property.
How to confirm Google Analytics 4 is working
After you go through all the setup steps, how do you really know your GA4 tag is installed and working correctly?
The two quickest and easiest ways are:
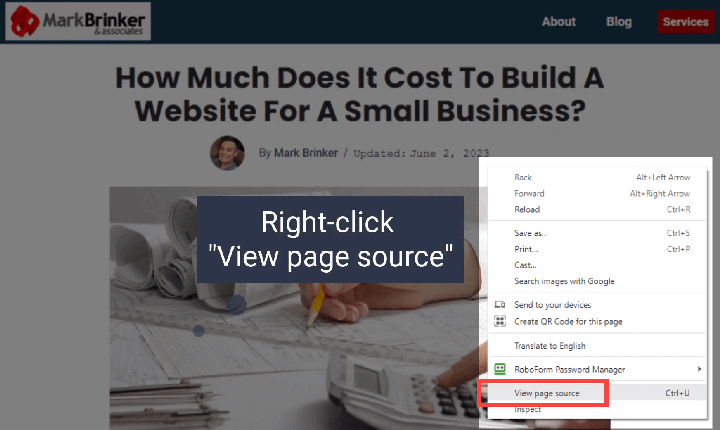
Method # 1: View the source code on your site
Open up any page on your website, then do a "right-click view page source" and search for the GA4 tag in the code.
Then, all you have to do is search for the measurement ID that's embedded in the GA4 tag, as shown below.
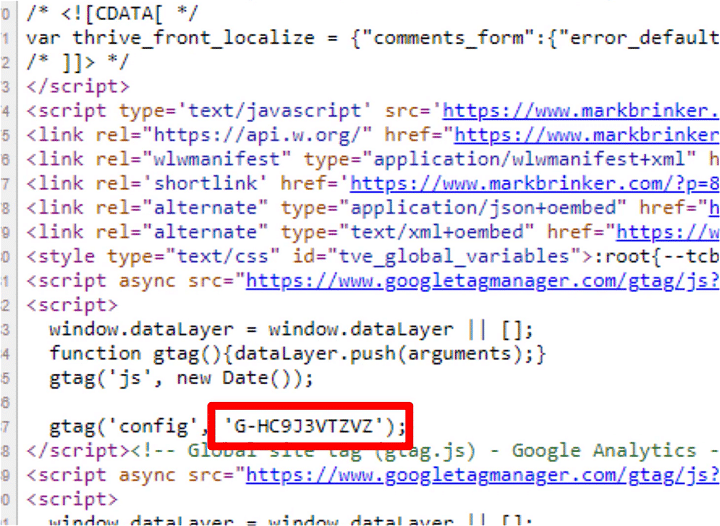
If you can see your GA4 tag in the source code of your website, you can be 99% certain it's working and sending data to your GA4 property.
(By the way, the keyboard shortcut for searching your source code is Control+F.)
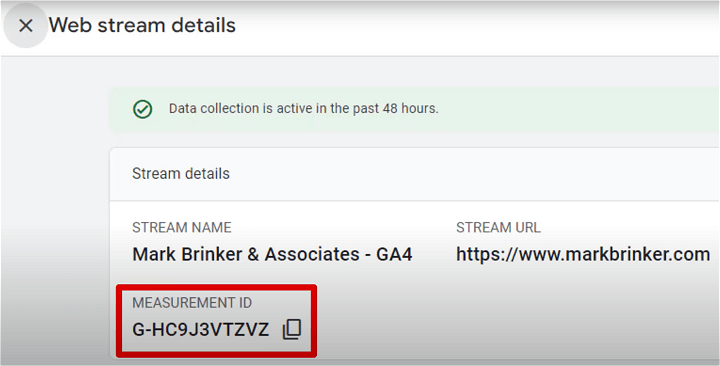
If you don't remember your GA4 measurement ID off the top of your head, just go to analytics.google.com, click the admin gear in the lower left and make sure your GA four property is selected, as shown below.
Go down to Data Streams, click the right arrow. then you'll have your measurement id:
Method # 2: View Realtime reports
The second way to confirm your GA4 tag is firing and sending data back to your GA4 property is to view Realtime reports.
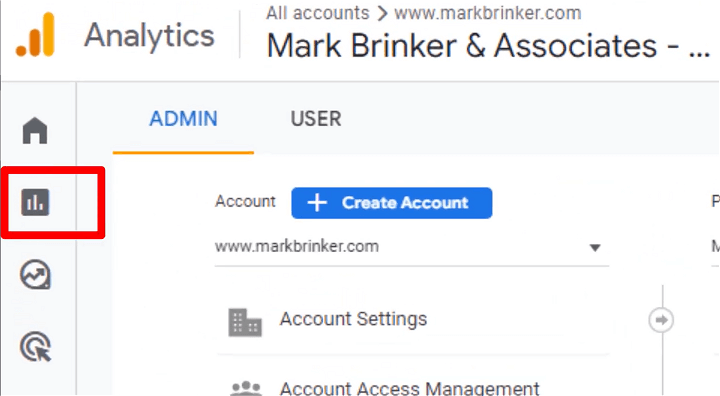
To get there, go to analytics.google.com, click the gear icon in the lower left, make sure your GA four property is selected.
Then on the left side of the page, click on Reports ... then "Realtime", as shown below.
Assuming you have people visiting your site, they will show up here and now you have 100% confirmation that everything is working properly, as shown below.
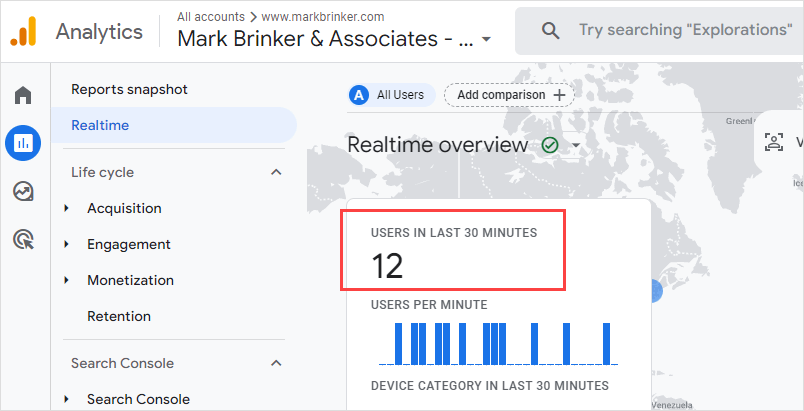
A quick note about Realtime reports ...
Realtime doesn't necessarily mean instantaneous.
There might be a 30-60 second lag before the Realtime overview registers a visit from a user. However, in the grand scheme of things, it's pretty quick.
Need help?
If you find all this tech stuff about GA4 confusing, we offer done-for-you services. Just click here and tell us what you need help with.
Conclusion
You've probably noticed that the GA4 dashboard is quite a bit different than the GA3 (i.e. Universal Analytics) dashboard.
That's because these two systems are totally different. Apples and oranges.
I'll have more info in the near future on how to customize your GA4 dashboard so you can make sense of all the incoming data from your site.
The primary goal today is to make sure you're aware that GA3 stops working on July 1st, 2023, as well as showing you how to quickly and easily set up a new GA4 property and get the data flowing from your website into your Google Analytics account.
Have a great rest of your day and I hope to see you again soon.