

If you'd prefer to watch this on YouTube, click here.
Does creating content for your business feel like rolling a boulder uphill?
Today I'll show you how to create high quality content in the shortest timeframe possible with the least amount of effort.
If you do content marketing for your business, you'll find my process especially valuable if you're a small business (or even a one-person show) that does not have the budget to hire an entire media department!
If you want to get your product, service or message in front of a LOT of people, YouTube is a good place to do it.
A quick side note: If you're struggling to come up with content topics and ideas, I have a whole separate piece that walks you through that process here.
The first step of my 5-part process is ...
Step # 1: Set the delivery date
Determine the "Must be published by date". Write it down or put it on your calendar. In a previous piece, I talked about the importance of creating urgency. Step # 1 is to create a little urgency for yourself. Otherwise, procrastination or analysis paralysis sets in.
By committing to a hard delivery date, you're saying, "Come hell or high water, my content will be published by this deadline." Even if you have to pull an all-nighter or even if your content may not be 100% perfect, it's going live by the delivery date.
Step # 2: Create your back-of-the-napkin outline
This step is called the back-of-the-napkin outline because you want to keep things simple.
At this stage, all you want to do is get some basic ideas out of your head and onto paper (or into a simple text file or onto the notes app on your phone).
You do not want to pour cold water on the creative process by complicating things. The purpose of the back-of-the-napkin outline is to quickly create a simple roadmap to organize your thoughts.
Whether I'm creating a back-of-the-napkin outline for an article or a video, the structure is pretty much the same. You start with an introduction, which is the segue between the title of your article (or video) and the main body of your content, as shown below.
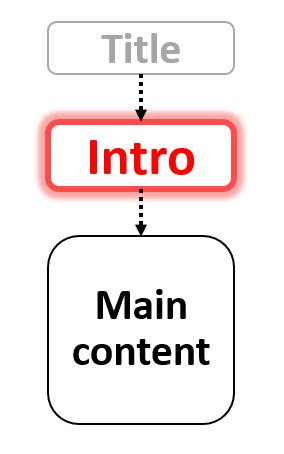
The introduction is one of the most important parts of your entire content piece because it's often where the game is won or lost. The intro is what grabs the reader's (or viewer's) attention and persuades them to continue with your content.
Two critical parts of an effective introduction are:
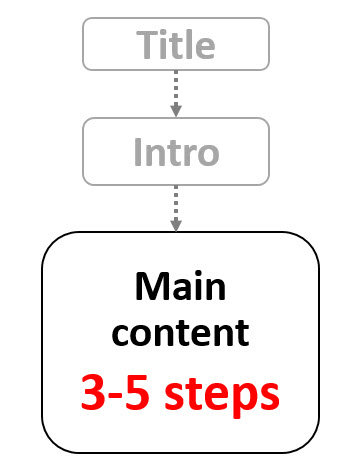
Regarding the main part of your content piece, I recommend a maximum of 3-5 sections or steps or bullet points. Three to five sections is kind of the sweet spot. Any more than that and you run the risk of losing the attention of your reader (or viewer).
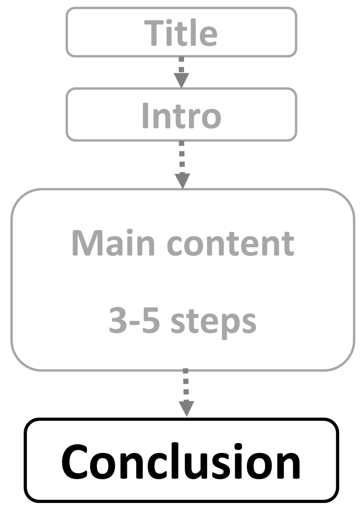
The last part of the outline is the conclusion. Just keep it simple and do a recap of what they just learned, and possibly include a call to action where you could say, "For more information, click here".
When creating your back-of-the-napkin outline, you'll need to iterate a few times . With each iteration, you'll fill things in, expand your ideas and crystallize your thoughts so everything flows smoothly and makes sense.
Pro tip: To avoid procrastination or overwhelm, set a timer. Just use the timer on your phone and set it for 10, 20, 30 minutes or whatever. Not too long. Keep it manageable. For that time period, focus exclusively on the task at hand. No checking email, social media, etc. I use this little timer trick nearly every day ... because it works and it helps me get things done. Try it!
Step # 3: Press record and start talking
Now you're going to record yourself and "talk out" your back-of-the-napkin outline. Pretend you're explaining your ideas in real life to another human being sitting across the table from you. As you talk out loud, don't censor yourself. Just talk. Even if you ramble a little bit, that's ok.
Talking out loud is the best way I know for overcoming writer's block and extracting ideas bottled up in your head.
When I'm working with a client to generate new content for their website, I conduct a content interview with them by phone and just talk with them about their business or medical practice or whatever they do. Every time I do a content interview, at some point we generate content gold because when you're talking out loud casually and not staring at a computer screen, stuff just rolls off your tongue naturally ... stream of consciousness.
Regarding the technology you can use to record yourself, here are three different options:
Step # 4: Transcribe your recording
Once you've recorded your rough draft, now you want to take that recording and transcribe it into words.
I use an online transcription service called rev.com.
All you do is upload your voice recording to rev.com and within minutes you'll have your transcription. It's very inexpensive, and for our purposes you do not need their human transcription option. Automated transcription works just fine.
And yes, I totally understand there are lots of apps and different ways to transcribe voice recordings. I'm simply showing you what I use because it's tested and it works.
Step # 5: The final edit
Now you'll download your transcription from rev.com and go through the final edit to polish things up because.
As you've might have heard me say previously ...
It's a thousand times easier to EDIT something than create it from scratch.
A few important points about the final editing process:
Conclusion
You now know my 5-step process that solves writer's block and avoids the white screen of death.
This process can be used for writing an article as well as creating a script for an audio or video.
It's the best way I've found for consistently producing high-quality content in the shortest timeframe possible with the least amount of effort.
If you struggle to create content, this process make things so much easier.
Creating an outline is one of the best ways to keep your thoughts and purpose organized before you write your blog post. When you create a complete, bulleted outline, you have a direction for your ideas, which helps keep you on track when you start to write.